This post was inspired by this awesome medium post and can be considered as supplementary post where Google login is implemented in environment with separate React app and Laravel API.
1. Creating Google project
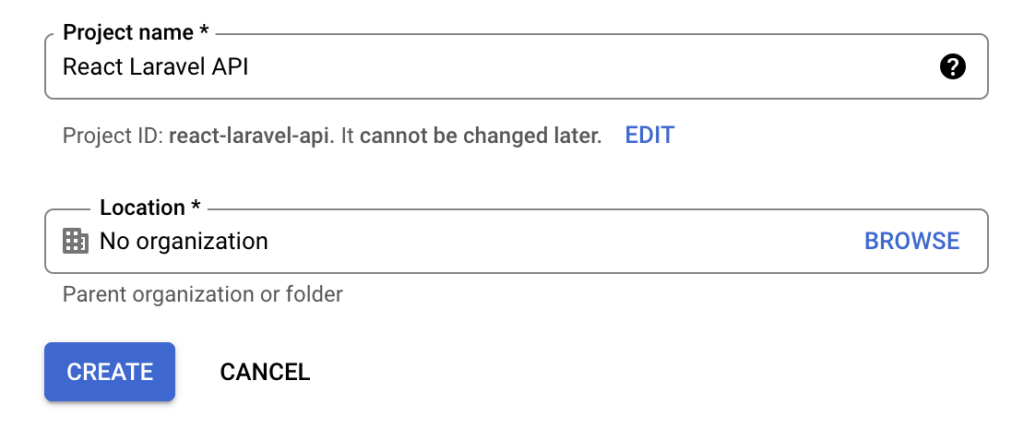
Create new google project here: https://console.developers.google.com/projectcreate.
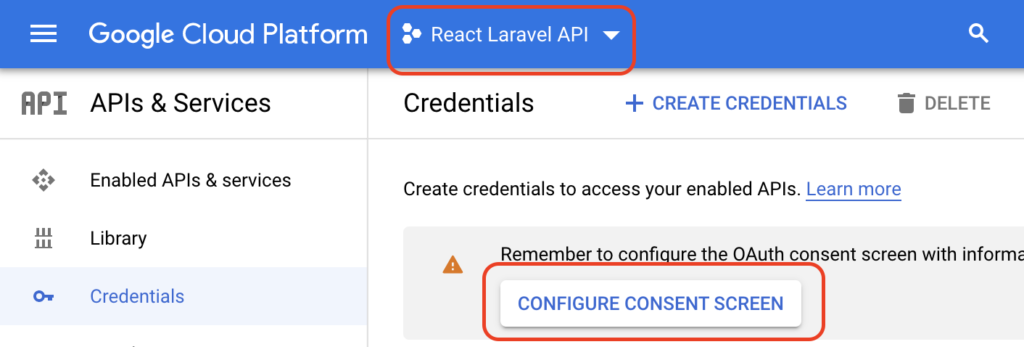
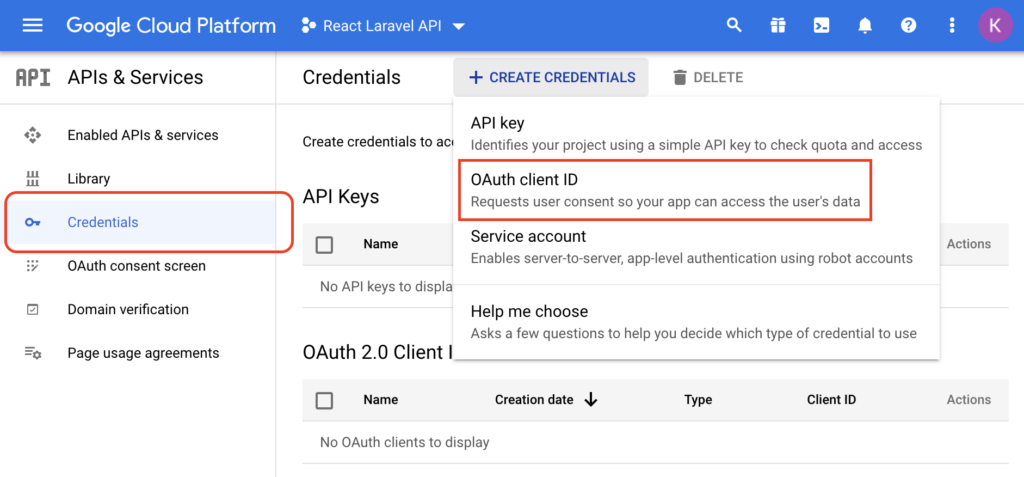
Once the project is created, proceed by creating new “OAuth 2.0 Client ID”.
First, make sure correct project is selected and then proceed with consent screen configuration by clicking on “CONFIGURE CONSENT SCREEN” button.
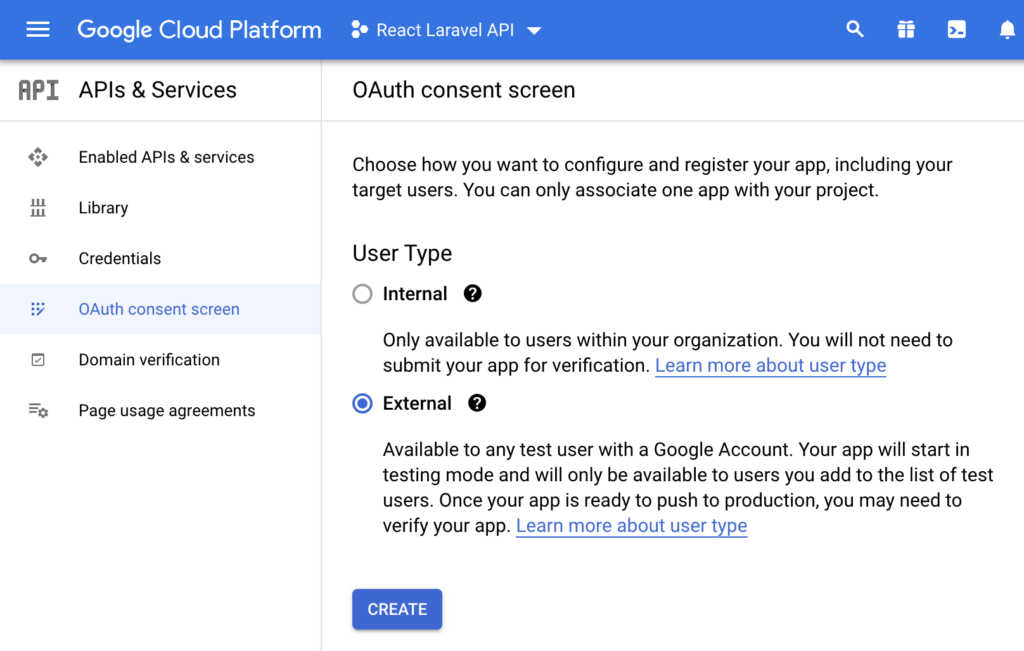
For the sake of this example, we will configure User Type as external.
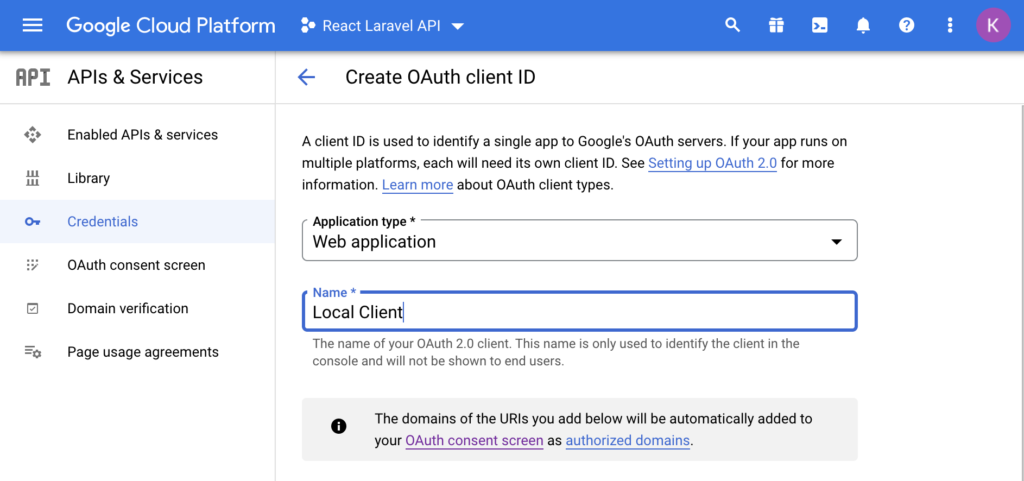
After you fill out the rest of the form (you can just fill in required fields and leave rest as default), let’s finally create OAuth Client.
Select “Web application” as Application type and give it friendly name.
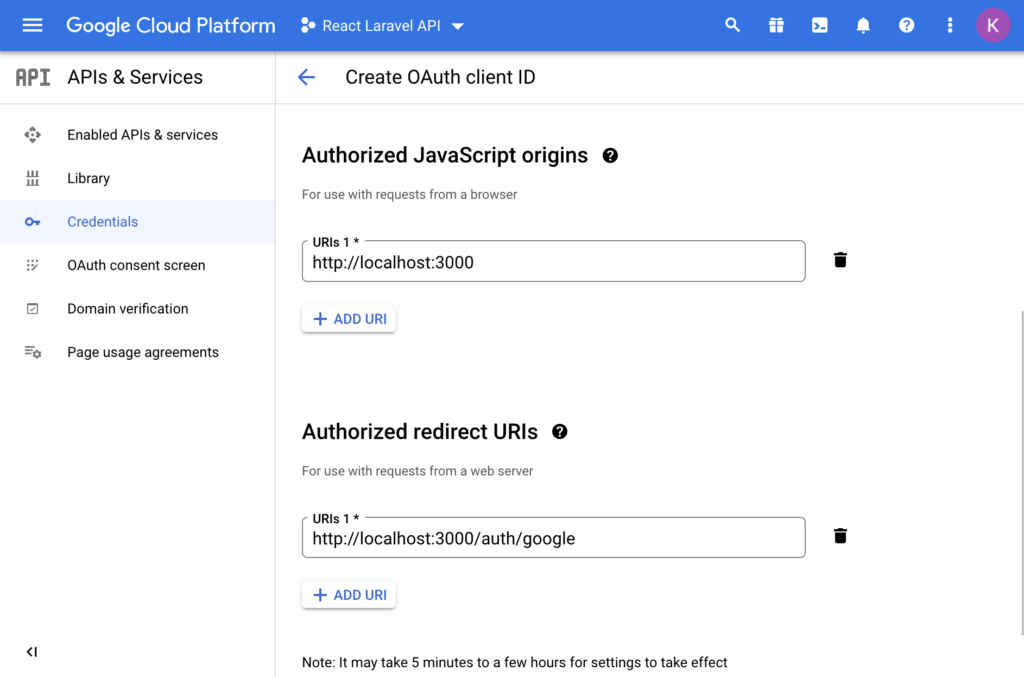
Next, add “Authorized JavasScript origins” and Authorized redirect URIs”. Since we will be creating React app with npx create-react-app and it runs the app on http://localhost:3000 by default, we will add that as authorized origin. Our redirect URI will be a route /auth/google so we add absolute url of that route to “Authorized redirect URIs”.
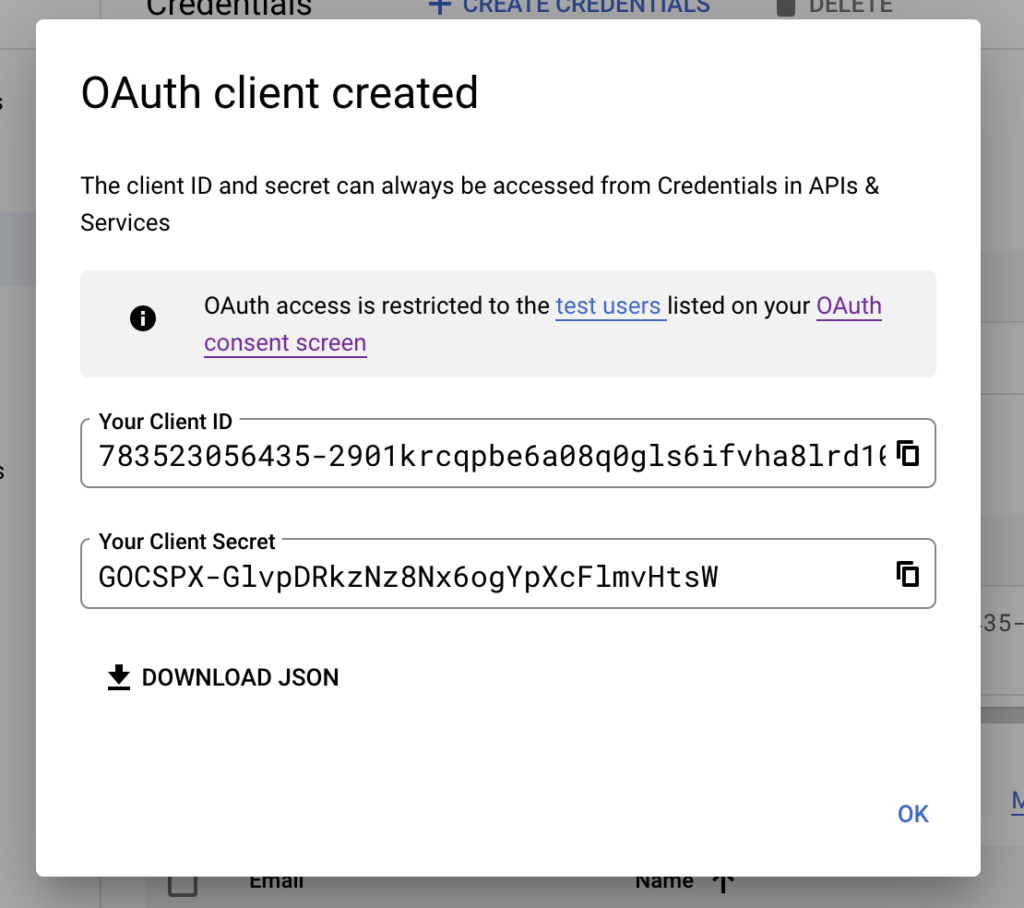
After filling up the details, click on create and you will get credentials in modal. Write them down or download JSON because we will need them in our Laravel app setup.
That’s it. Let’s proceed with creating Laravel API.
2. Creating Laravel API
2.1. Installing and configuring Laravel and required packages
First, let’s create new Laravel app. On MacOS, you can run the following command to install new Laravel app into “laravel” folder with Laravel Sail (mysql).
curl -s "https://laravel.build/laravel?with=mysql" | bashAs suggested at the end of command, run
cd laravel && ./vendor/bin/sail upIf everything went well, your app should be up and running on http://localhost.
Since Laravel now ships with Laravel Sanctum by default, we will be using it for API requests authentication. However, before we can issue API token for the user, we must “Sign it in” with Google. To do that, we will be using Laravel Socialite, so let’s proceed by adding it.
composer require laravel/socialiteTo finish the setup, we need to adjust config/services.php file and add env variables.
// config/services.php
return [
    ...
    'google' => [
        'client_id' => env('GOOGLE_CLIENT_ID'),
        'client_secret' => env('GOOGLE_CLIENT_SECRET'),
        'redirect' => env('GOOGLE_REDIRECT_URI'),
    ],
];
GOOGLE_CLIENT_ID and GOOGLE_CLIENT_SECRET you got in the last step of “Creating Google project” part. GOOGLE_REDIRECT_URI is the same as the one you configured in “Authorized Redirect URI” in Google project. This points to React App!!
// .env
GOOGLE_CLIENT_ID=783523056435-2901krcqpbe6a08q0gls6ifvha8lrd10.apps.googleusercontent.com
GOOGLE_CLIENT_SECRET=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
GOOGLE_REDIRECT_URI=http://localhost:3000/auth/google
2.2. Adjusting migrations and models
Next, let’s adjust the default migrations. Normally we would add new migration, but since we still haven’t migrated the DB, we can just simply change the default one. In this example we will add 2 fields. First one is required field google_id where users google id will be stored and second one is optional avatar field. You can check and store any other field that Google returns per your preference.
// database/migrations/2014_10_12_000000_create_users_table.php
public function up()
{
    Schema::create('users', function (Blueprint $table) {
        $table->id();
        $table->string('name');
        $table->string('email')->unique();
        $table->timestamp('email_verified_at')->nullable();
        $table->string('password')->nullable(); // Changed to nullable()
        $table->string('google_id'); // Added
        $table->string('avatar')->nullable(); // Added
        $table->rememberToken();
        $table->timestamps();
    });
}
And now we are ready to migrate the DB so you can run the following to run the migrations from Sail.
./vendor/bin/sail artisan migrateAlso, don’t forget to reflect the changes on the User model.
// app/Models/User.php
protected $fillable = [
    'name',
    'email',
    'email_verified_at', // Fillable since we will manually add it on Sign on
    'password',
    'google_id', // Added
    'avatar', // Added
];
2.3. Adding the routes and the controller logic.
First, we will need 2 new routes in routes/api.php.
// routes/api.php
use App\Http\Controllers\AuthController;
Route::get('auth', [AuthController::class, 'redirectToAuth']);
Route::get('auth/callback', [AuthController::class, 'handleAuthCallback']);
redirectToAuth method is straight forward. It just generates Google redirect url and returns it. Make sure you use stateless() since we are using this Laravel app as API and we are not keeping state at any time.
// app/Http/Controllers/AuthController.php
<?php
namespace App\Http\Controllers;
use App\Models\User;
use GuzzleHttp\Exception\ClientException;
use Illuminate\Http\JsonResponse;
use Laravel\Socialite\Contracts\User as SocialiteUser;
use Laravel\Socialite\Facades\Socialite;
class AuthController extends Controller
{
    public function redirectToAuth(): JsonResponse
    {
        return response()->json([
            'url' => Socialite::driver('google')
                         ->stateless()
                         ->redirect()
                         ->getTargetUrl(),
        ]);
    }
}
handleAuthCallback contains the logic to handle the callback. To keep it simple, we will just check if user is correctly authenticated, firstOrCreate the User and respond with the User and newly generated bearer token. Tokens are generated with Laravel Sanctum $user->createToken('google-token')->plainTextToken.
Normal use case would probably either re-use authentication token or invalidate previous ones, but that is up to you to implement and not in the scope of this example.
// app/Http/Controllers/AuthController.php
<?php
namespace App\Http\Controllers;
use App\Models\User;
use GuzzleHttp\Exception\ClientException;
use Illuminate\Http\JsonResponse;
use Laravel\Socialite\Contracts\User as SocialiteUser;
use Laravel\Socialite\Facades\Socialite;
class AuthController extends Controller
{
    public function handleAuthCallback(): JsonResponse
    {
        try {
            /** @var SocialiteUser $socialiteUser */
            $socialiteUser = Socialite::driver('google')->stateless()->user();
        } catch (ClientException $e) {
            return response()->json(['error' => 'Invalid credentials provided.'], 422);
        }
        /** @var User $user */
        $user = User::query()
            ->firstOrCreate(
                [
                    'email' => $socialiteUser->getEmail(),
                ],
                [
                    'email_verified_at' => now(),
                    'name' => $socialiteUser->getName(),
                    'google_id' => $socialiteUser->getId(),
                    'avatar' => $socialiteUser->getAvatar(),
                ]
            );
        return response()->json([
            'user' => $user,
            'access_token' => $user->createToken('google-token')->plainTextToken,
            'token_type' => 'Bearer',
        ]);
    }
}
That’s it. You can find this whole example with tests in this GitHub repository.
3. Creating React App
3.1 Installing React app
Let’s first create new React app with npx.
npx create-react-app react-app
cd react-app
npm start
If all went well, when you visit http://localhost:3000, you should see something like this.
3.2. Adding react-router-dom and configuring routes
For simplicity, let’s also add react-router-dom.
npm install --save react-router-domNow we can setup our routes in App.js file.
// src/App.js
import './App.css';
import {Route, BrowserRouter, Routes} from "react-router-dom";
import SignIn from "./SignIn";
import GoogleCallback from "./GoogleCallback";
function App() {
  return (
      <BrowserRouter>
          <Routes>
              <Route path="/" element={<SignIn />}></Route>
              <Route path="/auth/google" element={<GoogleCallback />}></Route>
          </Routes>
      </BrowserRouter>
  );
}
export default App;
3.3. Getting Google redirect url and redirecting to sing in form
SignIn component is simple. On load, we will fetch Google redirect url from Laravel API and set it as href for our link.
// src/SignIn.js
import React, {useState, useEffect} from 'react';
function SignIn() {
    const [loginUrl, setLoginUrl] = useState(null);
    useEffect(() => {
        fetch('http://localhost:80/api/auth', {
            headers : {
                'Content-Type': 'application/json',
                'Accept': 'application/json'
            }
        })
            .then((response) => {
                if (response.ok) {
                    return response.json();
                }
                throw new Error('Something went wrong!');
            })
            .then((data) => setLoginUrl( data.url ))
            .catch((error) => console.error(error));
    }, []);
    return (
        <div>
            {loginUrl != null && (
                <a href={loginUrl}>Google Sign In</a>
            )}
        </div>
    );
}
export default SignIn;
When user clicks on “Google Sign In” link, page will redirect to google authentication form.
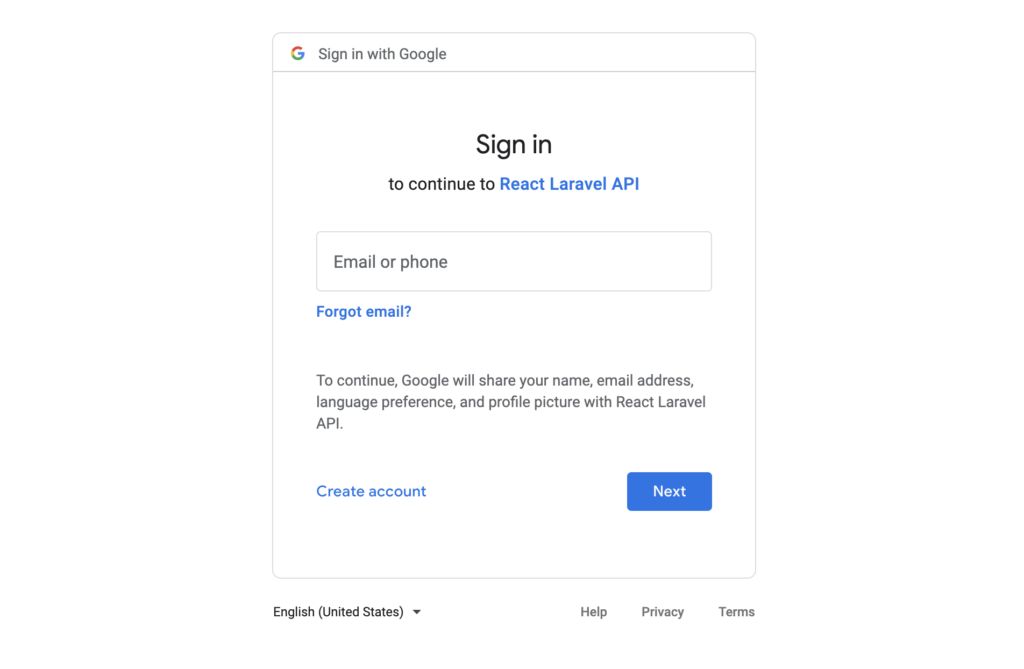
After successful authentication with Google account, Google will redirect back to the URL we setup in Laravel app .env variable GOOGLE_REDIRECT_URI with some additional data in search parameters.
3.4. Processing return callback and authenticating user requests
In our second component , GoogleCallback, we will take these search parameters and “proxy” them to Laravel API. If all goes well, Laravel will respond with newly created/fetched User and new Bearer authorization token which we can use to make authenticated calls to Laravel API sanctum protected routes.
// src/GoogleCallback.js
import React, {useState, useEffect} from 'react';
import {useLocation} from "react-router-dom";
function GoogleCallback() {
    const [loading, setLoading] = useState(true);
    const [data, setData] = useState({});
    const [user, setUser] = useState(null);
    const location = useLocation();
    // On page load, we take "search" parameters
    // and proxy them to /api/auth/callback on our Laravel API
    useEffect(() => {
        fetch(`http://localhost:80/api/auth/callback${location.search}`, {
            headers : {
                'Content-Type': 'application/json',
                'Accept': 'application/json'
            }
        })
            .then((response) => {
                return response.json();
            })
            .then((data) => {
                setLoading(false);
                setData(data);
            });
    }, []);
    // Helper method to fetch User data for authenticated user
    // Watch out for "Authorization" header that is added to this call
    function fetchUserData() {
        fetch(`http://localhost:80/api/user`, {
            headers : {
                'Content-Type': 'application/json',
                'Accept': 'application/json',
                'Authorization': 'Bearer ' + data.access_token,
            }
        })
            .then((response) => {
                return response.json();
            })
            .then((data) => {
                setUser(data);
            });
    }
    if (loading) {
        return <DisplayLoading/>
    } else {
        if (user != null) {
            return <DisplayData data={user}/>
        } else {
            return (
                <div>
                    <DisplayData data={data}/>
                    <div style={{marginTop:10}}>
                        <button onClick={fetchUserData}>Fetch User</button>
                    </div>
                </div>
            );
        }
    }
}
function DisplayLoading() {
    return <div>Loading....</div>;
}
function DisplayData(data) {
    return (
        <div>
            <samp>{JSON.stringify(data, null, 2)}</samp>
        </div>
    );
}
export default GoogleCallback;
That’s it! You now have fully functioning Google sign in with React and Laravel API.
You can find the whole project in this GitHub repository.
External resources
- Laravel Installation docs – https://laravel.com/docs/9.x/installation#choosing-your-sail-services
- Laravel Socialite – https://laravel.com/docs/9.x/socialite
- Laravel Sanctum, issuing API tokens – https://laravel.com/docs/9.x/sanctum#issuing-api-tokens
- React, installation – https://create-react-app.dev/docs/getting-started
- React, adding router – https://create-react-app.dev/docs/adding-a-router
Do you need help with setting up Google sign in with React and Laravel API?
For anything related to Laravel development send us your inquiry to [email protected]!