Ten post został zainspirowany tym niesamowitym średnim postem i można go uznać za dodatkowy post, w którym logowanie Google jest zaimplementowane w środowisku z oddzielną aplikacją React i API Laravel.
1. Tworzenie projektu
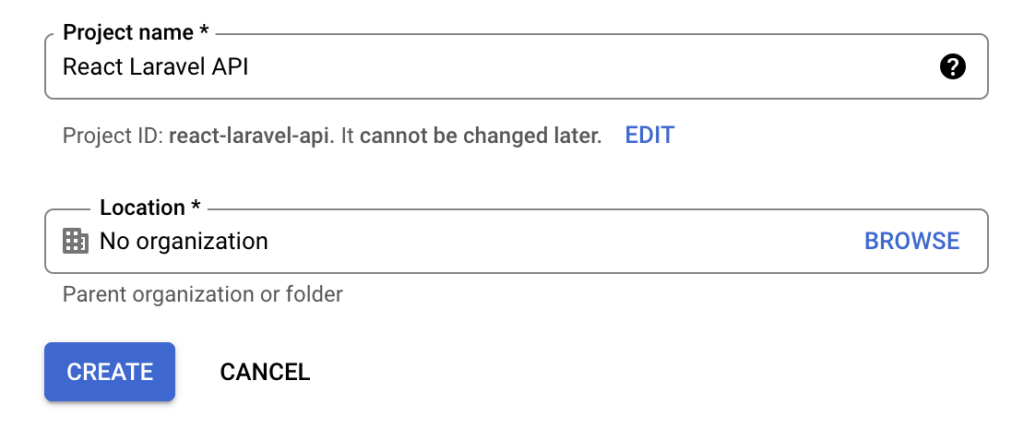
Google Utwórz nowy projekt Google tutaj: https://console.developers.google.com/projectcreate.
Po utworzeniu projektu przejdź do tworzenia nowego "Identyfikatora klienta OAuth 2.0".
Najpierw upewnij się, że wybrany jest właściwy projekt, a następnie przejdź do konfiguracji ekranu zgody, klikając przycisk
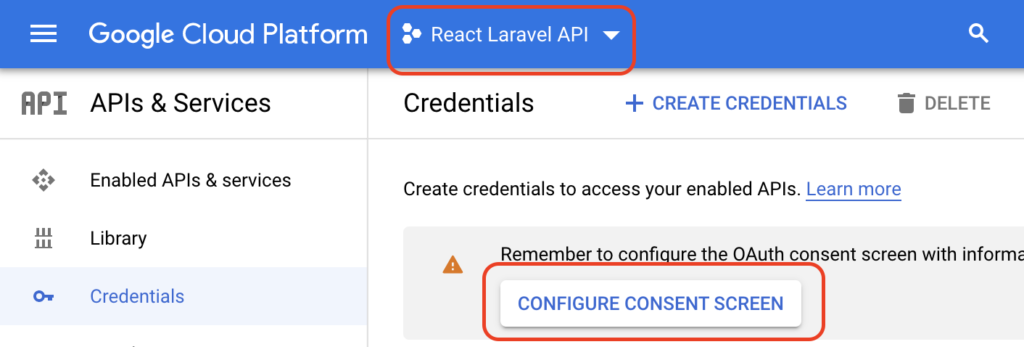
"KONFIGURUJ EKRAN ZGODY".Na potrzeby tego przykładu skonfigurujemy typ użytkownika jako zewnętrzny.
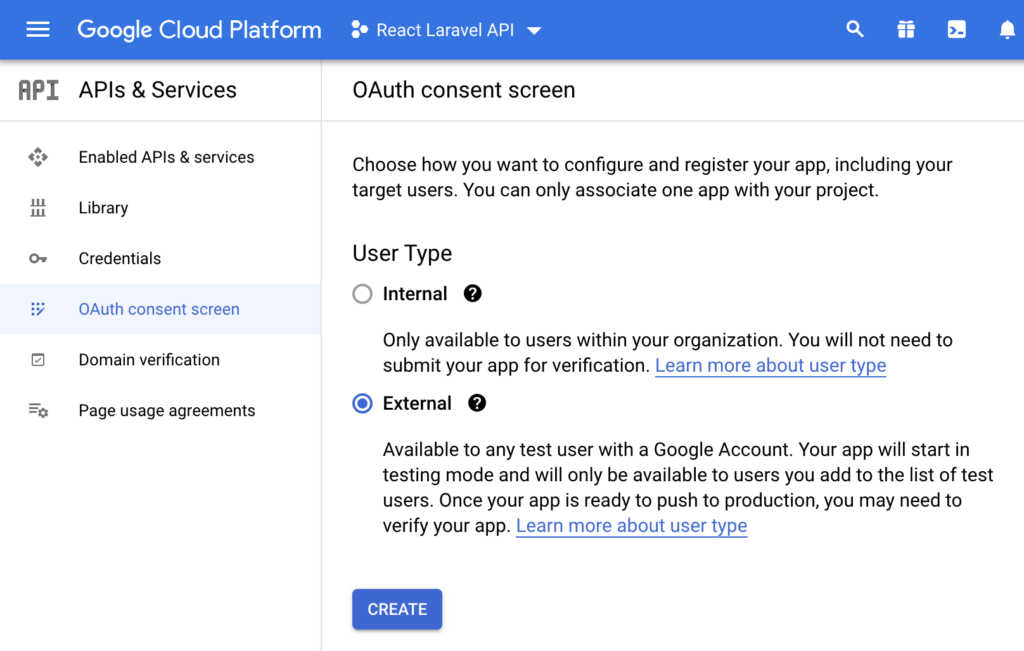
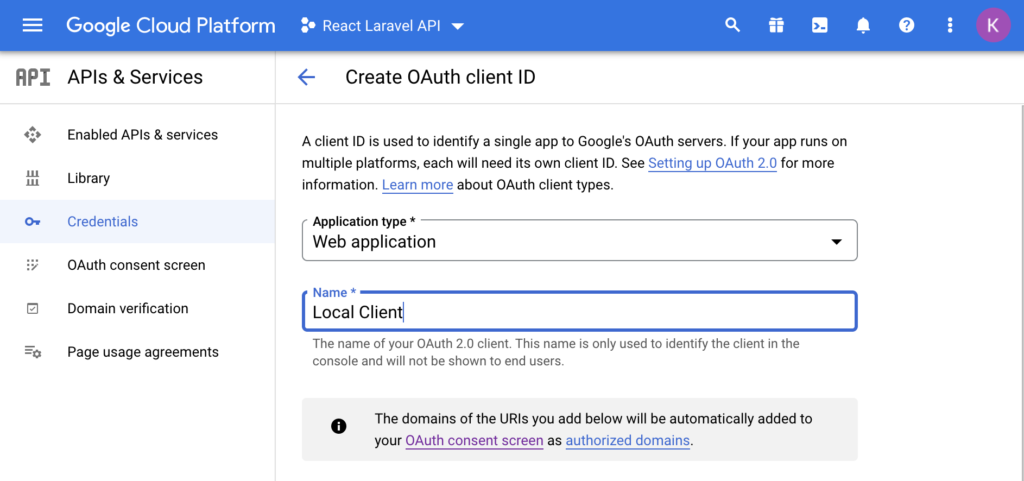
Po wypełnieniu pozostałej części formularza (możesz po prostu wypełnić wymagane pola i pozostawić resztę jako domyślną), w końcu utwórzmy klienta OAuth.
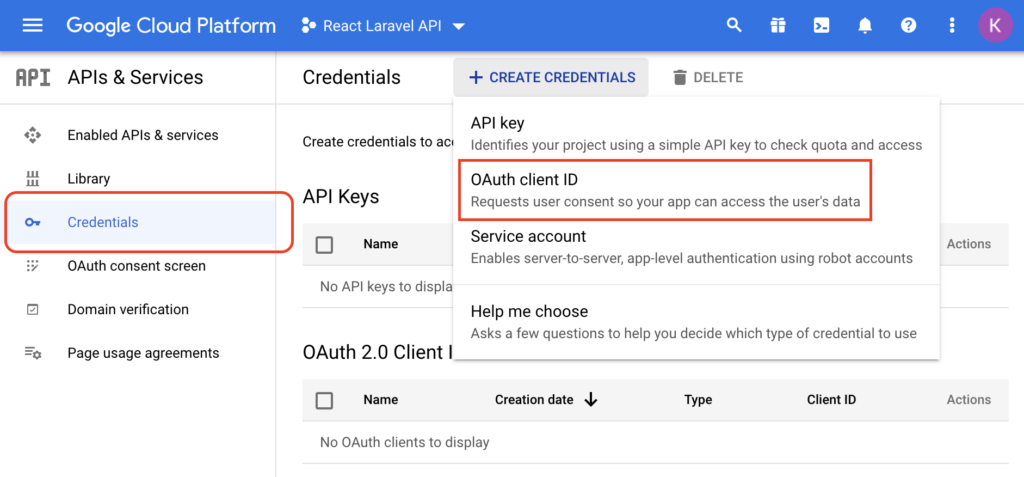
Wybierz "Aplikacja internetowa" jako Typ aplikacji i nadaj jej przyjazną nazwę.
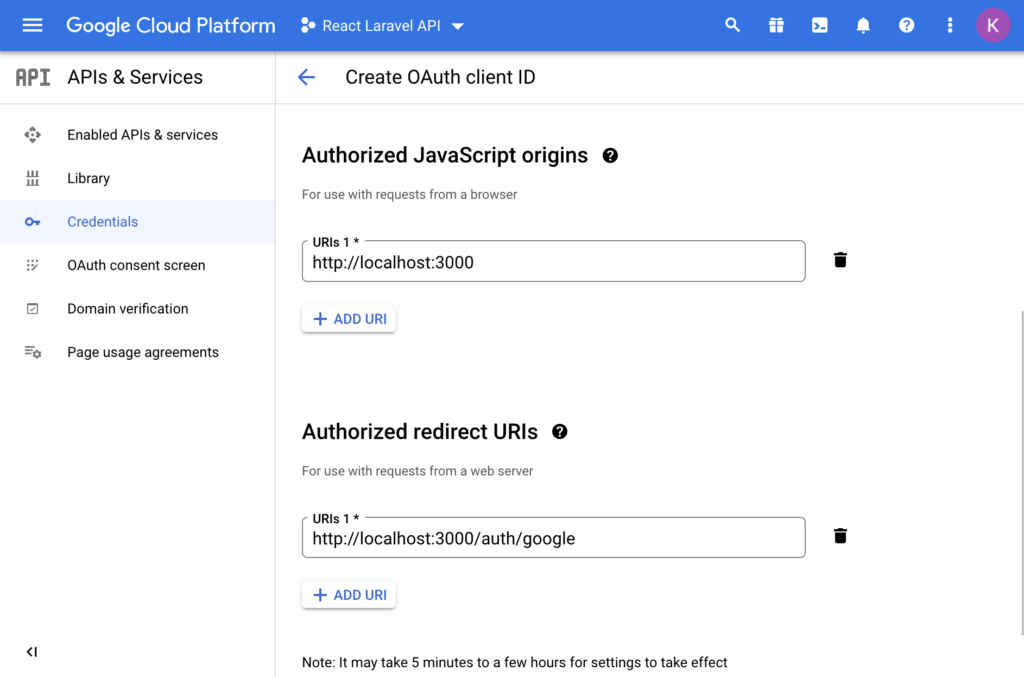
Następnie dodaj "Autoryzowane źródła JavasScript" i Autoryzowane identyfikatory URI przekierowania". Ponieważ będziemy tworzyć aplikację React i npx create-react-app domyślnie uruchamia aplikację http://localhost:3000 , dodamy ją jako autoryzowane źródło. Nasz identyfikator URI przekierowania będzie trasą /auth/google , więc dodamy bezwzględny adres URL tej trasy do "Autoryzowanych identyfikatorów URI przekierowania".
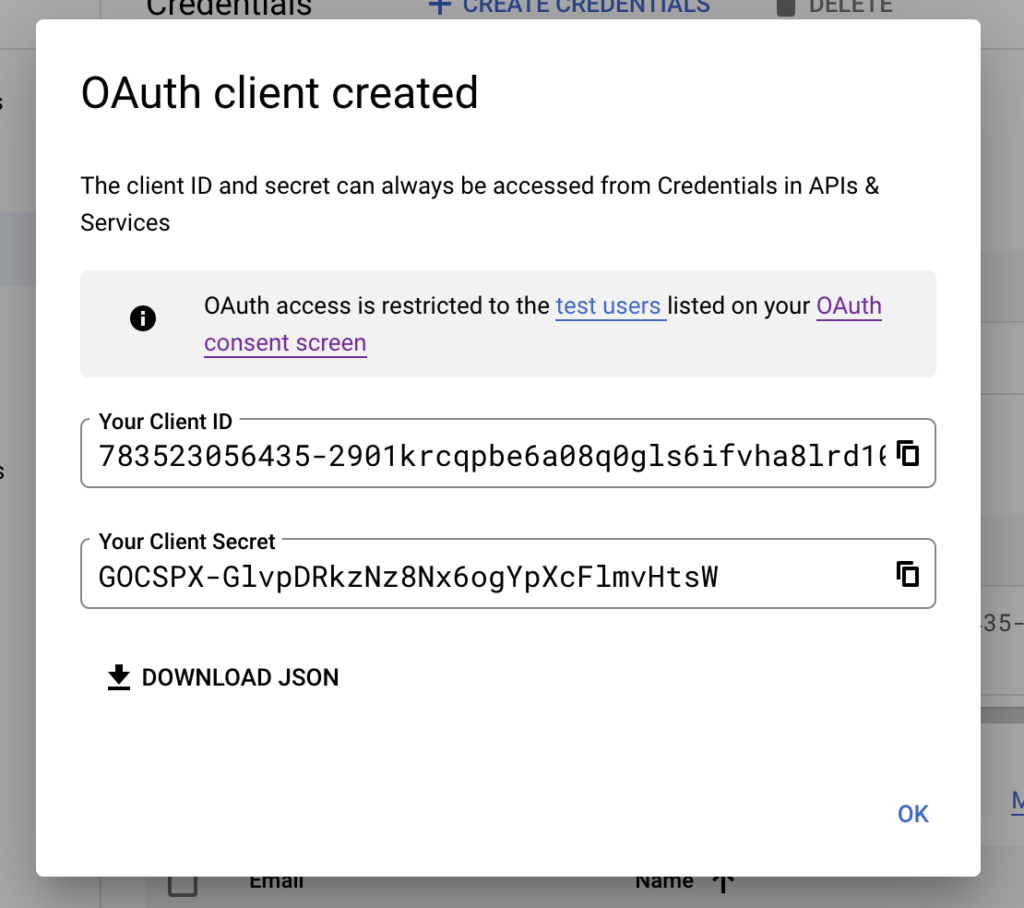
Po wypełnieniu danych kliknij utwórz, a otrzymasz dane uwierzytelniające w oknie modalnym. Zapisz je lub pobierz JSON, ponieważ będziemy ich potrzebować w naszej konfiguracji aplikacji Laravel.
Otóż to. Przejdźmy do tworzenia API Laravel.
2. Stworzenie API
Laravela 2.1. Instalowanie i konfigurowanie Laravela oraz wymaganych pakietów
Najpierw utwórzmy nową aplikację Laravel. W systemie MacOS możesz uruchomić następujące polecenie, aby zainstalować nową aplikację Laravel w folderze "laravel" za pomocą Laravel Sail (mysql).
curl -s "https://laravel.build/laravel?with=mysql" | bashZgodnie z sugestią na końcu polecenia uruchom
cd laravel && ./vendor/bin/sail upJeśli wszystko poszło dobrze, aplikacja powinna być uruchomiona na http://localhost.
Ponieważ Laravel jest teraz domyślnie dostarczany z Laravel Sanctum, będziemy go używać do uwierzytelniania żądań API. Zanim jednak będziemy mogli wystawić token API dla użytkownika, musimy "Zaloguj się" za pomocą Google. Aby to zrobić, użyjemy Laravel Socialite, więc przejdźmy od jego dodania.
composer require laravel/socialiteAby zakończyć konfigurację, musimy dostosować config/services.php plik i dodać zmienne env.
// config/services.php
return [
    ...
    'google' => [
        'client_id' => env('GOOGLE_CLIENT_ID'),
        'client_secret' => env('GOOGLE_CLIENT_SECRET'),
        'redirect' => env('GOOGLE_REDIRECT_URI'),
    ],
];
GOOGLE_CLIENT_ID and GOOGLE_CLIENT_SECRET you got in the last step of “Creating Google project” part. GOOGLE_REDIRECT_URI is the same as the one you configured in “Authorized Redirect URI” in Google project. This points to React App!!
// .env
GOOGLE_CLIENT_ID=783523056435-2901krcqpbe6a08q0gls6ifvha8lrd10.apps.googleusercontent.com
GOOGLE_CLIENT_SECRET=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
GOOGLE_REDIRECT_URI=http://localhost:3000/auth/google
2.2. Dostosowywanie migracji i modeli
Następnie dostosujmy domyślne migracje. Normalnie dodalibyśmy nową migrację, ale ponieważ nadal nie przenieśliśmy bazy danych, możemy po prostu zmienić domyślną. W tym przykładzie dodamy 2 pola. Pierwsze z nich to pole wymagane, w którym będzie przechowywany identyfikator Google użytkownika, a drugie to pole google_id opcjonalne avatar . Możesz sprawdzić i zapisać dowolne inne pole, które Google zwraca zgodnie z Twoimi preferencjami.
// database/migrations/2014_10_12_000000_create_users_table.php
public function up()
{
    Schema::create('users', function (Blueprint $table) {
        $table->id();
        $table->string('name');
        $table->string('email')->unique();
        $table->timestamp('email_verified_at')->nullable();
        $table->string('password')->nullable(); // Changed to nullable()
        $table->string('google_id'); // Added
        $table->string('avatar')->nullable(); // Added
        $table->rememberToken();
        $table->timestamps();
    });
}
A teraz jesteśmy gotowi do migracji bazy danych, więc możesz uruchomić następujące czynności, aby uruchomić migracje z Sail.
./vendor/bin/sail artisan migrateNie zapomnij również odzwierciedlić zmian w modelu użytkownika.
// app/Models/User.php
protected $fillable = [
    'name',
    'email',
    'email_verified_at', // Fillable since we will manually add it on Sign on
    'password',
    'google_id', // Added
    'avatar', // Added
];
2.3. Dodawanie tras i logiki sterownika.
Najpierw będziemy potrzebować 2 nowych tras w routes/api.php.
// routes/api.php
use App\Http\Controllers\AuthController;
Route::get('auth', [AuthController::class, 'redirectToAuth']);
Route::get('auth/callback', [AuthController::class, 'handleAuthCallback']);
redirectToAuth method is straight forward. It just generates Google redirect url and returns it. Make sure you use stateless() since we are using this Laravel app as API and we are not keeping state at any time.
// app/Http/Controllers/AuthController.php
<?php
namespace App\Http\Controllers;
use App\Models\User;
use GuzzleHttp\Exception\ClientException;
use Illuminate\Http\JsonResponse;
use Laravel\Socialite\Contracts\User as SocialiteUser;
use Laravel\Socialite\Facades\Socialite;
class AuthController extends Controller
{
    public function redirectToAuth(): JsonResponse
    {
        return response()->json([
            'url' => Socialite::driver('google')
                         ->stateless()
                         ->redirect()
                         ->getTargetUrl(),
        ]);
    }
}
handleAuthCallback contains the logic to handle the callback. To keep it simple, we will just check if user is correctly authenticated, firstOrCreate the User and respond with the User and newly generated bearer token. Tokens are generated with Laravel Sanctum $user->createToken('google-token')->plainTextToken.
Normalny przypadek użycia prawdopodobnie ponownie użyje tokenu uwierzytelniania lub unieważni poprzednie, ale to zależy od Ciebie, a nie w zakresie tego przykładu.
// app/Http/Controllers/AuthController.php
<?php
namespace App\Http\Controllers;
use App\Models\User;
use GuzzleHttp\Exception\ClientException;
use Illuminate\Http\JsonResponse;
use Laravel\Socialite\Contracts\User as SocialiteUser;
use Laravel\Socialite\Facades\Socialite;
class AuthController extends Controller
{
    public function handleAuthCallback(): JsonResponse
    {
        try {
            /** @var SocialiteUser $socialiteUser */
            $socialiteUser = Socialite::driver('google')->stateless()->user();
        } catch (ClientException $e) {
            return response()->json(['error' => 'Invalid credentials provided.'], 422);
        }
        /** @var User $user */
        $user = User::query()
            ->firstOrCreate(
                [
                    'email' => $socialiteUser->getEmail(),
                ],
                [
                    'email_verified_at' => now(),
                    'name' => $socialiteUser->getName(),
                    'google_id' => $socialiteUser->getId(),
                    'avatar' => $socialiteUser->getAvatar(),
                ]
            );
        return response()->json([
            'user' => $user,
            'access_token' => $user->createToken('google-token')->plainTextToken,
            'token_type' => 'Bearer',
        ]);
    }
}
Otóż to. Cały ten przykład z testami można znaleźć w tym repozytorium GitHub.
3. Tworzenie aplikacji
React 3.1 Instalacja aplikacji
React Najpierw utwórzmy nową aplikację React za pomocą npx.
npx create-react-app react-app
cd react-app
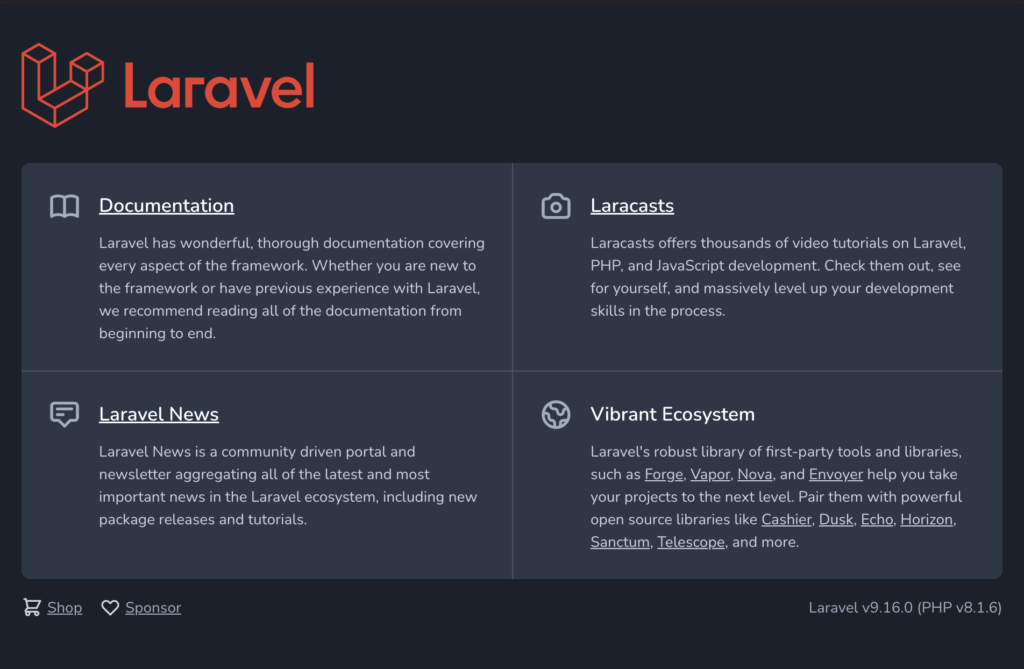
npm startJeśli wszystko poszło dobrze, podczas wizyty http://localhost:3000powinieneś zobaczyć coś takiego.
3.2. Dodawanie react-router-dom i konfigurowanie tras
Dla uproszczenia dodajmy react-router-domrównież .
npm install --save react-router-domTeraz możemy ustawić nasze trasy w App.js pliku.
// src/App.js
import './App.css';
import {Route, BrowserRouter, Routes} from "react-router-dom";
import SignIn from "./SignIn";
import GoogleCallback from "./GoogleCallback";
function App() {
return (
<BrowserRouter>
<Routes>
<Route path="/" element={<SignIn />}></Route>
<Route path="/auth/google" element={<GoogleCallback />}></Route>
</Routes>
</BrowserRouter>
);
}
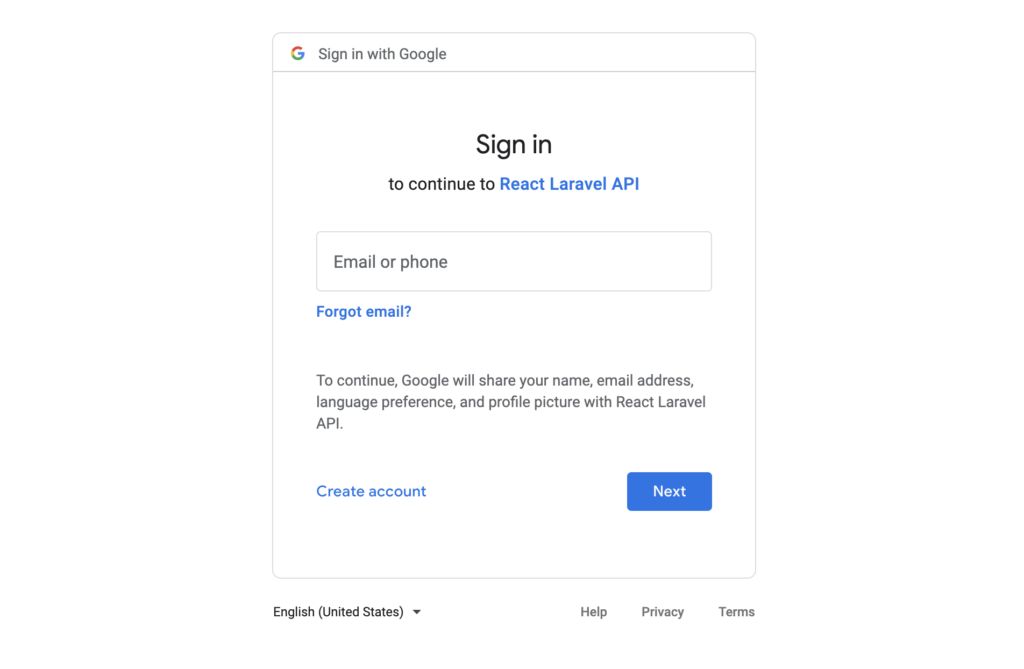
export default App;3.3. Uzyskanie adresu URL przekierowania Google i przekierowanie do formularza Gdy użytkownik kliknie link "Google Sign In", strona zostanie przekierowana do formularza
SignIn component is simple. On load, we will fetch Google redirect url from Laravel API and set it as href for our link.
// src/SignIn.js
import React, {useState, useEffect} from 'react';
function SignIn() {
    const [loginUrl, setLoginUrl] = useState(null);
    useEffect(() => {
        fetch('http://localhost:80/api/auth', {
            headers : {
                'Content-Type': 'application/json',
                'Accept': 'application/json'
            }
        })
            .then((response) => {
                if (response.ok) {
                    return response.json();
                }
                throw new Error('Something went wrong!');
            })
            .then((data) => setLoginUrl( data.url ))
            .catch((error) => console.error(error));
    }, []);
    return (
        <div>
            {loginUrl != null && (
                <a href={loginUrl}>Google Sign In</a>
            )}
        </div>
    );
}
export default SignIn;
uwierzytelniającego Google.
Po pomyślnym uwierzytelnieniu za pomocą konta Google, Google przekieruje z powrotem do adresu URL, który skonfigurowaliśmy w zmiennej GOOGLE_REDIRECT_URI .env aplikacji Laravel z dodatkowymi danymi w search parametrach.
3.4. Przetwarzanie zwrotnego wywołania zwrotnego i uwierzytelnianie żądań
użytkownika W naszym drugim komponencie, , GoogleCallbackweźmiemy te search parametry i "proxy" je do API Laravel. Jeśli wszystko pójdzie dobrze, Laravel odpowie nowo utworzonym/pobranym tokenem autoryzacyjnym Użytkownika i nowym tokenem autoryzacyjnym Bearer, którego możemy użyć do wykonania uwierzytelnionych wywołań tras chronionych przez Laravel API sanctum.
// src/GoogleCallback.js
import React, {useState, useEffect} from 'react';
import {useLocation} from "react-router-dom";
function GoogleCallback() {
    const [loading, setLoading] = useState(true);
    const [data, setData] = useState({});
    const [user, setUser] = useState(null);
    const location = useLocation();
    // On page load, we take "search" parameters
    // and proxy them to /api/auth/callback on our Laravel API
    useEffect(() => {
        fetch(`http://localhost:80/api/auth/callback${location.search}`, {
            headers : {
                'Content-Type': 'application/json',
                'Accept': 'application/json'
            }
        })
            .then((response) => {
                return response.json();
            })
            .then((data) => {
                setLoading(false);
                setData(data);
            });
    }, []);
    // Helper method to fetch User data for authenticated user
    // Watch out for "Authorization" header that is added to this call
    function fetchUserData() {
        fetch(`http://localhost:80/api/user`, {
            headers : {
                'Content-Type': 'application/json',
                'Accept': 'application/json',
                'Authorization': 'Bearer ' + data.access_token,
            }
        })
            .then((response) => {
                return response.json();
            })
            .then((data) => {
                setUser(data);
            });
    }
    if (loading) {
        return <DisplayLoading/>
    } else {
        if (user != null) {
            return <DisplayData data={user}/>
        } else {
            return (
                <div>
                    <DisplayData data={data}/>
                    <div style={{marginTop:10}}>
                        <button onClick={fetchUserData}>Fetch User</button>
                    </div>
                </div>
            );
        }
    }
}
function DisplayLoading() {
    return <div>Loading....</div>;
}
function DisplayData(data) {
    return (
        <div>
            <samp>{JSON.stringify(data, null, 2)}</samp>
        </div>
    );
}
export default GoogleCallback;
Otóż to! Masz teraz w pełni funkcjonalne logowanie Google za pomocą React i Laravel API.
Cały projekt można znaleźć w tym repozytorium GitHub.
Zasoby zewnętrzne
- Laravel Installation docs – https://laravel.com/docs/9.x/installation#choosing-your-sail-services
- Laravel Socialite – https://laravel.com/docs/9.x/socialite
- Laravel Sanctum, issuing API tokens – https://laravel.com/docs/9.x/sanctum#issuing-api-tokens
- React, installation – https://create-react-app.dev/docs/getting-started
- React, adding router – https://create-react-app.dev/docs/adding-a-router
Potrzebujesz pomocy przy konfigurowaniu logowania przez Google za pomocą React i Laravel API?
W przypadku jakichkolwiek informacji związanych z rozwojem Laravela wyślij nam zapytanie na adres [email protected]!