Laravel Polymorphic Relationship allows a model to belong to more than one other model on a single association. We will take an official Laravel documentation example for this tutorial. Let us take the example of “comment” in both posts and videos. Using polymorphic relationships, you can use a single comments table for both of these scenarios.
By default, Laravel will use the fully qualified class name to store the type of the related model.
There are four types of Polymorphic relationships in Laravel.
- One To One Polymorphic Relationship
- One To Many Polymorphic Relationship
- Many To Many Polymorphic Relationship
- Custom Polymorphic Relationship
One To One Polymorphic Relationship
A one-to-one polymorphic relation is comparable to a simple one-to-one relation; however, the target model can belong to more than one type of model on a single association.
For example, a blog Post and a User may share a polymorphic relation to the Image model.
Using a one-to-one polymorphic relation enables you to have a single list of unique images that are accepted for both blog posts and user accounts.
One To Many Polymorphic Relationship
A one-to-many polymorphic relation is comparable to a simple one-to-many relation; however, the target model can belong to more than one type of model on a single association.
For example, imagine users of your app can “comment” on both posts and videos.
Using polymorphic relationships, you may use the single comments table for both of these use cases.
Many To Many Polymorphic Relationship
Many-to-many polymorphic relations are somewhat more complicated than morphOne and morphMany relationships.
For instance, a blog Post and Video model could share a polymorphic relation to the Tag model.
Using a many-to-many polymorphic relation lets, you have a single list of unique tags shared across blog posts and videos.
Custom Polymorphic Relationship
For example, given the one-to-many example above where a Comment may belong to a Post or a Video, the default commentable_type would be App\Post or App\Video, respectively.
However, you may envy to decouple your database from your application’s internal structure.
In that case, you may set a “morph map” to instruct Eloquent to use a custom name for each model instead of a class name.
Now, let’s take a general example of a Polymorphic relationship.
There is a total of three tables.
- posts
- videos
- comments
Now, the reason we can apply the Polymorphic Relationship here is that comment can be applied to both posts and videos.
So, the Comment model can be associated with Post and Video.
Now, we need to add two extra columns inside the posts table.
- commentable_id (Integer)
- commentable_type (String)
The commentable_id column will contain the ID value of the post or video.
The commentable_type column will contain the class name of the owning model.
Now, let us start practice on Laravel Polymorphic Relationship Example.
We start our project by installing the Laravel project.
Step 1: Install Laravel 6
Type the following command in your terminal.
laravel new relationships# or
composer create-project laravel/laravel relationships --prefer-distAfter installation, go into the project.
cd relationshipsOpen the project in your code editor.
code .Setup the database inside the .env file.
Now, create an Authentication scaffold using the following command.
php artisan make:authStep 2: Create models and migrations.
Go to your terminal and first create a Post model.
php artisan make:model Post -mAlso, we create a Video model.
php artisan make:model Video -mNow, define the schema for both of the migrations. But, first, let us define a schema for create_posts_table.
// create_posts_table

public function up()
{
   Schema::create('posts', function (Blueprint $table) {
        $table->increments('id');
        $table->string('name');
        $table->timestamps();
    });
}
Now define a schema for the create_videos_table.
// create_videos_table

public function up()
{
     Schema::create('videos', function (Blueprint $table) {
         $table->increments('id');
         $table->string('name');
         $table->timestamps();
     });
}
Okay, now migrate using the following command.
php artisan migrateStep 3: Create two controller files.
Okay, now we will create two controllers to render the views.
- PostController
- VideoController
Type the following command to generate it.
php artisan make:controller PostController
php artisan make:controller VideoController
Now, write the following code inside the PostController.php file.
// PostController.php

<?php

namespace App\Http\Controllers;

use Illuminate\Http\Request;
use App\Post;

class PostController extends Controller
{
    public function show(Post $post)
    {
        return view('post.show', compact('post'));
    }
}
Same for, VideoController.php file.
// VideoController.php

<?php

namespace App\Http\Controllers;

use Illuminate\Http\Request;
use App\Video;

class VideoController extends Controller
{
    public function show(Video $video)
    {
        return view('video.show', compact('video'));
    }
}
Now, create two folders inside the views folder.
- post
- video
Inside the post folder, create a new file called the show.blade.php file. Also, the same creates the same show.blade.php file inside a video folder.
Step 4: Define routes to show the Post and Video.
Inside the web.php file, write the following code.
// web.php
Route::get('/post/{post}', 'PostController@show')->name('post.show');
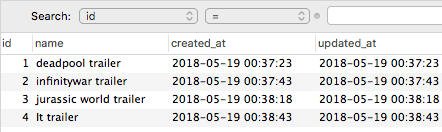
Route::get('/video/{video}', 'VideoController@show')->name('video.show');Now, enter the data manually in the database. In real-time, the data is coming from a form, but for this demo, First, enter some dummy data in the posts table.
 Now, insert the data into the videos table.
So, we have inserted dummy data in both tables.
Step 5: Code the view files.
Inside post >> show.blade.php file, write the following code.
<h3>{{ $post->name }}</h3>Now, go to the browser and type this URL: http://relationships.test/post/1. You can see the 1st post.
Same for the video >> show.blade.php file, write the following code.
<h3>{{ $video->name }}</h3>Same, go to the browser and hit this URL: http://relationships.test/video/1. You can see the 1st video.
Step 6: Create a Comment model.
Type the following command to generate a model as well as migration.
php artisan make:model Comment -mNow, write the following schema inside create_comments_table.
// create_comments_table

public function up()
{
    Schema::create('comments', function (Blueprint $table) {
         $table->increments('id');
         $table->integer('user_id')->unsigned();
         $table->text('body');
         $table->integer('commentable_id')->unsigned();
         $table->string('commentable_type');
         $table->timestamps();
    });
}
Migrate that schema to the database.
php artisan migrateStep 7: Define the relationships.
Now, we store a user_id inside the comments table; we have a relationship with the User.
A Comment is a belongsTo User. So we can write this relationship inside the Comment.php model file.
 // Comment.php

public function user()
{
    return $this->belongsTo(User::class);
}
Okay, now we write one more function inside the Comment.php file, which is commentable().
// Comment.php

public function commentable()
{
    return $this->morphTo();
}
Now this means that now one or more models can use this Comment model. In our example, It can be associated with Post and Video. Both use this same Comment model.
Okay, so the next step is the post model has many comments. So we can define the relationship inside the Post.php file like this.
// Post.php

<?php

namespace App;

use Illuminate\Database\Eloquent\Model;

class Post extends Model
{
    public function comments()
    {
        return $this->morphMany(Comment::class, 'commentable');
    }
}
Also, the same for the Video.php file.
 // Video.php

<?php

namespace App;

use Illuminate\Database\Eloquent\Model;

class Video extends Model
{
    public function comments()
    {
        return $this->morphMany(Comment::class, 'commentable');
    }
}
Step 8: Insert manual data inside the comments table.
We have set up all the relationships. We need to enter the demo comments and see if we get the comments on the video and post’s show page.

So, the first column is id, as usual, auto-increments, second is user_id, which is currently signed user.
The third column is commentable_id; in our case, it is either the post table’s id or the video table’s id.
So, we have attached posts and videos tables to their respective comments.
Now, render the post with their comments in the show.blade.php file.
<h3>{{ $post->name }}</h3>

<ul>
    @foreach($post->comments as $comment)
    <li>{{ $comment->body }}</li>
    @endforeach
</ul>
Go to the browser and hit this URL: http://relationships.test/post/1. You can see the post name and comment body.
You can write the same view file for the video >> show.blade.php.
<h3>{{ $video->name }}</h3>

<ul>
    @foreach($video->comments as $comment)
    <li>{{ $comment->body }}</li>
    @endforeach
</ul>
Now, test this URL: http://relationships.test/video/1.
That is it; we have successfully displayed the post and video with their respective comments.
Although, in this example, I have inserted hardcode values, but we will see programmatically in the future.