У попередній публікації ми створили навігацію по вкладках за допомогою Alpine.js, і я сказав, що хочу навести вам більш складний приклад. Отже, давайте створимо звичайну контактну форму так:
Заковика в тому, що ми будемо надсилати дані через AJAX і обробляти всі дані форми з Alpine. Я робив це незліченну кількість разів з ванільним JS або jQuery, і це завжди монотонне завдання. Ви повинні отримати всі елементи за посиланням, отримати доступ до їх значень, а потім надіслати дані. Alpine (та інші фронтенд-фреймворки) роблять це завдання легким.
Як я вже говорив, це буде проста форма (ім'я, електронна пошта, кнопка надсилання повідомлення), але якщо ви отримаєте ідею за реалізацією, ви можете застосувати її в більш просунутих ситуаціях. Ви можете перейти до цього сховища GitHub, щоб отримати код і слідувати з головної гілки, або скористатися гілкою розробки, щоб отримати кінцевий результат. Це важлива частина:Тепер, що стосується частини AJAX, давайте просто скористаємося API вибірки, щоб нам не довелося тягнути зовнішню залежність, але ви, звичайно, можете адаптувати це до своїх потреб:
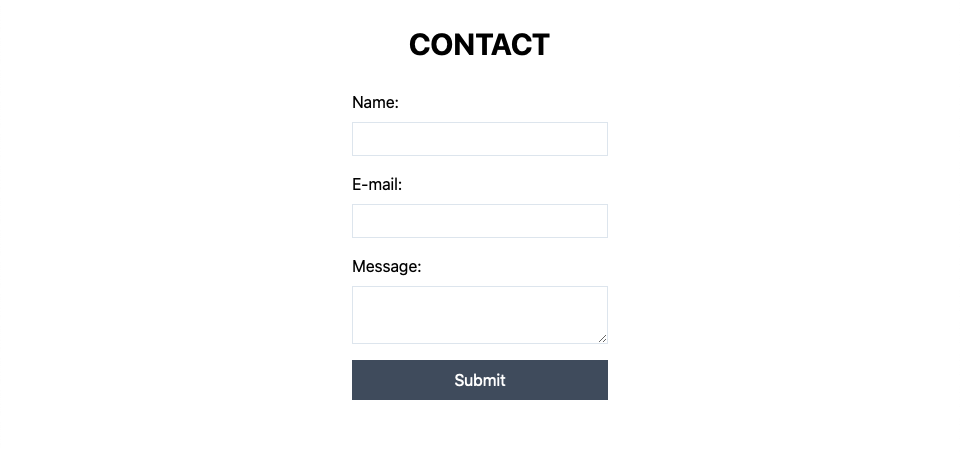
<form action="/contact" method="POST" class="w-64 mx-auto">
	<div class="mb-4">
		<label class="block mb-2">Name:</label>
		<input type="text" name="name" class="border w-full p-1">
	</div>
    <div class="mb-4">
		<label class="block mb-2">E-mail:</label>
        <input type="email" name="email" class="border w-full p-1">
	</div>
	<div class="mb-4">
		<label class="block mb-2">Message:</label>
		<textarea name="message" class="border w-full p-1"></textarea>
	</div>
	<button class="bg-gray-700 hover:bg-gray-800 text-white w-full p-2">Submit</button>
</form>
That’s the basic HTML structure of the form. Up to now, there’s no JavaScript at all, it’s just a regular form that would work with a page reload. Now, let’s sprinkle some Alpine.js on it. Last time, I added the data object inline inside the x-data. This time, since that object will be more convoluted, I’ll show you that you can do most of the “heavy lifting” inside a script tag as such:
<script>
    function contactForm() {
      return {
        formData: {
          name: '',
          email: '',
          message: ''
        },
      }
    }
</script>
Then you just need to add that function call inside the x-data:
<form action="/contact" method="POST" class="w-64 mx-auto" x-data="contactForm()">Now, let me present you the x-model directive. This keeps input elements in sync with the component data. We have the formData object inside the component scope, so we can use them in the inputs and textareas like this:
<form action="/contact" method="POST" class="w-64 mx-auto" x-data="contactForm()">
    <div class="mb-4">
      <label class="block mb-2">Name:</label>
      <input type="text" name="name" class="border w-full p-1" x-model="formData.name">
    </div>

    <div class="mb-4">
      <label class="block mb-2">E-mail:</label>
      <input type="email" name="email" class="border w-full p-1" x-model="formData.email">
    </div>

    <div class="mb-4">
      <label class="block mb-2">Message:</label>
      <textarea name="message" class="border w-full p-1" x-model="formData.message"></textarea>
    </div>
    <button class="bg-gray-700 hover:bg-gray-800 text-white w-full p-2">Submit</button>
</form>
In vanilla JavaScript, you would probably have to grab the element with something like getElementById and then access its value. With x-model, you don’t have to worry about it. As you type in the input element, your data object is automatically updated with whatever you typed.
function contactForm() {
	return {
		formData: {
			name: '',
			email: '',
			message: ''
		},
		message: '',

		submitData() {
			this.message = ''

			fetch('/contact', {
				method: 'POST',
				headers: { 'Content-Type': 'application/json' },
                body: JSON.stringify(this.formData)
            })
			.then(() => {
				this.message = 'Form sucessfully submitted!'
			})
			.catch(() => {
				this.message = 'Ooops! Something went wrong!'
			})
		}
	}
}
and add this paragraph before the form closing tag:
<p x-text="message"></p>If you don’t understand what the .then and .catch statements are, dont' worry, you can check out this article about promises. I’ll probably do a blog post about it in the future, stay tuned. Basically, this whole submitData method will do a POST request to the /contact route and pass the form data as a stringified JSON. If everything is successful the .then block is executed, if there's and error in the response, the .catch is executed.
Тепер ми повинні викликати цей метод після подання форми. Елемент форми випромінює submit подію, тому ми можемо прослухати його за допомогою директивиx-on, а оскільки ми не хочемо перезавантажувати сторінку, ми додаємо модифікатор події, щоб свого роду "захопити" подання форми та використовувати наш власний метод "submitData":
<form action="/contact" method="POST" class="w-64 mx-auto" x-data="contactForm()" @submit.prevent="submitData">That's it! You’ve got yourself a working AJAX form built with Alpine.js. But let’s take a step forward and add some dynamic styling to the submit button to improve the user experience:
Додайте цей тег стилю всередину голови (я просто додам .prevent цей стиль, тому що на даний момент, Tailwind CSS не підтримує вимкнений стан з коробки):Оновіть contactForm функцію наступним чином:
<style>
    button:disabled {
      cursor: not-allowed;
      opacity: 0.5;
    }
</style>
Now, replace the old submit button with this one:
<button class="bg-gray-700 hover:bg-gray-800 disabled:opacity-50 text-white w-full p-2 mb-4" x-text="buttonLabel" :disabled="loading"></button>The two interesting bits are the x-text directive and the :disabled. We will use the x-text to change the button's label dynamically and :disabled to, well, disable the button while the form is being submitted.
loading: false,
buttonLabel: 'Submit',

submitData() {
	this.buttonLabel = 'Submitting...'
	this.loading = true;
	this.message = ''

	fetch('/contact', {
		method: 'POST',
		headers: { 'Content-Type': 'application/json' },
		body: JSON.stringify(this.formData)
	})
	.then(() => {
    	this.message = 'Form sucessfully submitted!'
    })
	.catch(() => {
		this.message = 'Ooops! Something went wrong!'
	})
	.finally(() => {
		this.loading = false;
		this.buttonLabel = 'Submit'
	})
}