W poprzednim poście zbudowaliśmy nawigację po kartach za pomocą Alpine.js i powiedziałem, że chcę przedstawić bardziej złożony przykład. Zbudujmy więc zwykły formularz kontaktowy w ten sposób:
Haczyk polega na tym, że wyślemy dane przez AJAX i zajmiemy się wszystkimi danymi formularza za pomocą Alpine. Robiłem to niezliczoną ilość razy z waniliowym JS lub jQuery i zawsze jest to monotonne zadanie. Musisz uzyskać wszystkie elementy przez odniesienie, uzyskać dostęp do ich wartości, a następnie wysłać dane. Alpine (i inne frameworki frontendowe) sprawiają, że to zadanie jest dziecinnie proste.
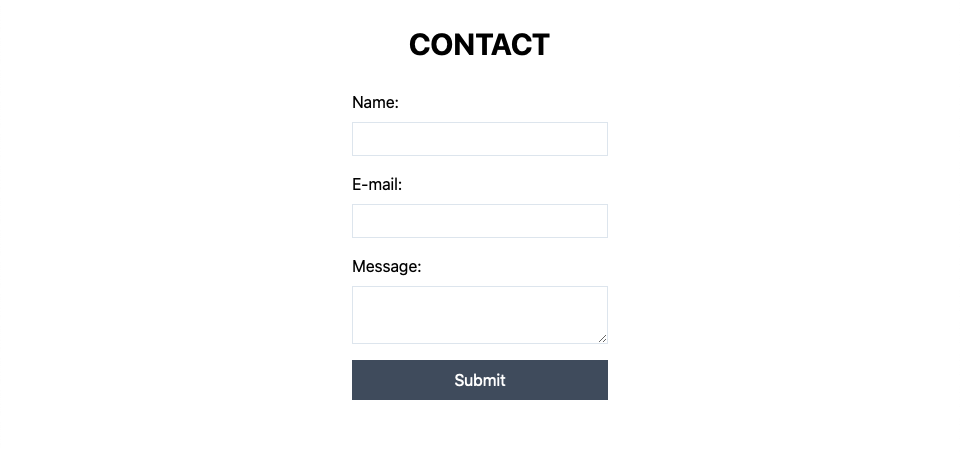
Jak powiedziałem, będzie to prosty formularz (imię i nazwisko, e-mail, przycisk wysyłania wiadomości), ale jeśli wpadniesz na pomysł wdrożenia, możesz zastosować go w bardziej zaawansowanych sytuacjach. Możesz przejść do tego repozytorium GitHub, aby pobrać kod i postępować zgodnie z gałęzią główną, lub użyć gałęzi develop, aby uzyskać ostateczny wynik.
<form action="/contact" method="POST" class="w-64 mx-auto">
	<div class="mb-4">
		<label class="block mb-2">Name:</label>
		<input type="text" name="name" class="border w-full p-1">
	</div>
    <div class="mb-4">
		<label class="block mb-2">E-mail:</label>
        <input type="email" name="email" class="border w-full p-1">
	</div>
	<div class="mb-4">
		<label class="block mb-2">Message:</label>
		<textarea name="message" class="border w-full p-1"></textarea>
	</div>
	<button class="bg-gray-700 hover:bg-gray-800 text-white w-full p-2">Submit</button>
</form>
That’s the basic HTML structure of the form. Up to now, there’s no JavaScript at all, it’s just a regular form that would work with a page reload. Now, let’s sprinkle some Alpine.js on it. Last time, I added the data object inline inside the x-data. This time, since that object will be more convoluted, I’ll show you that you can do most of the “heavy lifting” inside a script tag as such:
<script>
    function contactForm() {
      return {
        formData: {
          name: '',
          email: '',
          message: ''
        },
      }
    }
</script>
Then you just need to add that function call inside the x-data:
<form action="/contact" method="POST" class="w-64 mx-auto" x-data="contactForm()">Now, let me present you the x-model directive. This keeps input elements in sync with the component data. We have the formData object inside the component scope, so we can use them in the inputs and textareas like this:
<form action="/contact" method="POST" class="w-64 mx-auto" x-data="contactForm()">
    <div class="mb-4">
      <label class="block mb-2">Name:</label>
      <input type="text" name="name" class="border w-full p-1" x-model="formData.name">
    </div>

    <div class="mb-4">
      <label class="block mb-2">E-mail:</label>
      <input type="email" name="email" class="border w-full p-1" x-model="formData.email">
    </div>

    <div class="mb-4">
      <label class="block mb-2">Message:</label>
      <textarea name="message" class="border w-full p-1" x-model="formData.message"></textarea>
    </div>
    <button class="bg-gray-700 hover:bg-gray-800 text-white w-full p-2">Submit</button>
</form>
In vanilla JavaScript, you would probably have to grab the element with something like getElementById and then access its value. With x-model, you don’t have to worry about it. As you type in the input element, your data object is automatically updated with whatever you typed.
Teraz, jeśli chodzi o część AJAX, po prostu użyjmy API pobierania, abyśmy nie musieli pobierać zewnętrznej zależności, ale możesz oczywiście dostosować to do swoich potrzeb:
function contactForm() {
	return {
		formData: {
			name: '',
			email: '',
			message: ''
		},
		message: '',

		submitData() {
			this.message = ''

			fetch('/contact', {
				method: 'POST',
				headers: { 'Content-Type': 'application/json' },
                body: JSON.stringify(this.formData)
            })
			.then(() => {
				this.message = 'Form sucessfully submitted!'
			})
			.catch(() => {
				this.message = 'Ooops! Something went wrong!'
			})
		}
	}
}
and add this paragraph before the form closing tag:
<p x-text="message"></p>If you don’t understand what the .then and .catch statements are, dont' worry, you can check out this article about promises. I’ll probably do a blog post about it in the future, stay tuned. Basically, this whole submitData method will do a POST request to the /contact route and pass the form data as a stringified JSON. If everything is successful the .then block is executed, if there's and error in the response, the .catch is executed.
Teraz musimy wywołać tę metodę po przesłaniu formularza. Element formularza emituje submit zdarzenie, więc możemy go odsłuchać za pomocą x-on dyrektywy, a ponieważ nie chcemy ponownie ładować strony, dodajemy .prevent modyfikator zdarzenia, aby w pewnym sensie "przechwycić" przesyłanie formularza i użyć naszej własnej metody "submitData":
<form action="/contact" method="POST" class="w-64 mx-auto" x-data="contactForm()" @submit.prevent="submitData">That's it! You’ve got yourself a working AJAX form built with Alpine.js. But let’s take a step forward and add some dynamic styling to the submit button to improve the user experience:
Dodaj ten znacznik stylu wewnątrz nagłówka (dodam tylko ten styl, ponieważ na razie, Tailwind CSS nie obsługuje stanu wyłączonego po wyjęciu z pudełka):Zaktualizuj contactForm funkcję o następujące elementy:
<style>
    button:disabled {
      cursor: not-allowed;
      opacity: 0.5;
    }
</style>
Now, replace the old submit button with this one:
<button class="bg-gray-700 hover:bg-gray-800 disabled:opacity-50 text-white w-full p-2 mb-4" x-text="buttonLabel" :disabled="loading"></button>The two interesting bits are the x-text directive and the :disabled. We will use the x-text to change the button's label dynamically and :disabled to, well, disable the button while the form is being submitted.
loading: false,
buttonLabel: 'Submit',

submitData() {
	this.buttonLabel = 'Submitting...'
	this.loading = true;
	this.message = ''

	fetch('/contact', {
		method: 'POST',
		headers: { 'Content-Type': 'application/json' },
		body: JSON.stringify(this.formData)
	})
	.then(() => {
    	this.message = 'Form sucessfully submitted!'
    })
	.catch(() => {
		this.message = 'Ooops! Something went wrong!'
	})
	.finally(() => {
		this.loading = false;
		this.buttonLabel = 'Submit'
	})
}